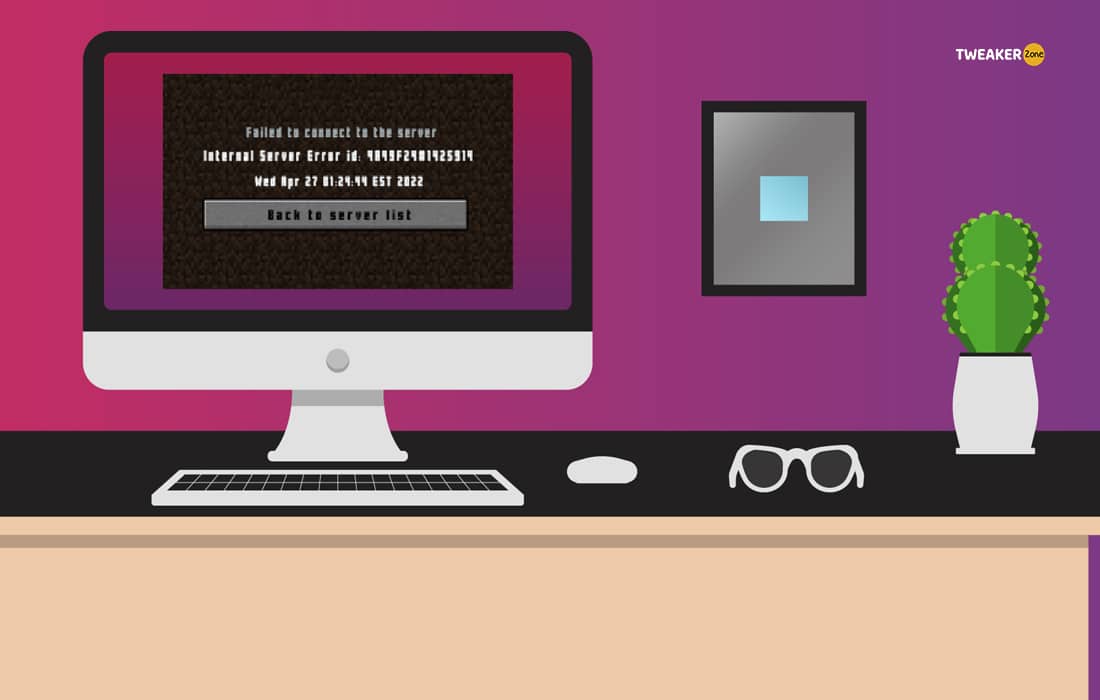
Who doesn’t love to play Minecraft with their friends online, especially in the Minecraft Realms? But we all know that things get really annoying once we start getting an internal server error in Minecraft amid a high-tension game. However, it has some pretty easy solutions!
You can resolve the internal server error by restarting the game, your system, and the router. Besides, you need to update Minecraft and the network driver as well. If nothing works, you must resort to advanced methods like tweaking network settings and disabling all mods and plugins.
Many people even take it further and reset their whole Minecraft Realm or set their Java priority in high mode to solve this issue. But here, we will give you a step-by-step solution to fix this issue.
Table of Contents
What Are The Primary Causes Of The Internal Server Error In Minecraft?
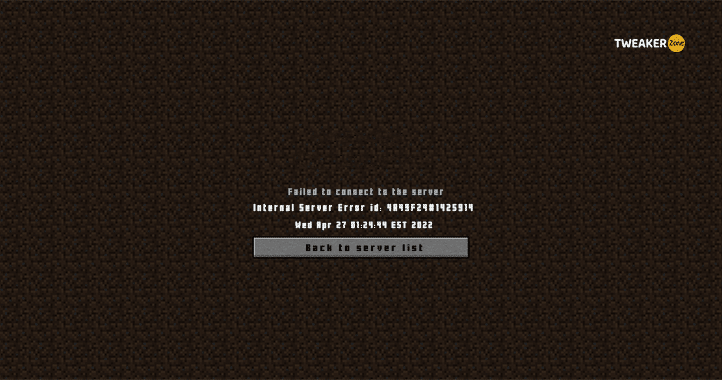
It is pretty common to get server errors in Minecraft, although the developers are trying their best to make this game free from any error. But, until now, there are six primary reasons why this network bug or error can be triggered.
- The Minecraft installation file is corrupted or has the wrong variables in the root directory.
- You are using an obsolete version of Minecraft or an outdated version of your network driver.
- The log files that store the encrypted login data of the Minecraft server are buggy or corrupted.
- The mod pack you are using is incompatible with the Minecraft version.
- Your system has buggy or corrupted temporary files created by the Minecraft multiplayer.
- You are using bad in-game plugins that are interfering with the game itself.
Besides these six, there may be several other reasons, such as your Java priority being too low or not using the correct UUID. Many people get this error for corrupted JSON files as well.
3 Quick Fixes For Internal Server Error In Minecraft
As it is pretty common in Windows systems, there are three quick fixes to solve this issue. So, before you delve into any pro methods, you should first try to fix them with these common methods!
1. Power Cycle Your Router
Power-cycling (Switching off – hold – switching it back) your router not only solves network issues in most cases but also increases the lifespan of the router itself. It will also automatically flush the router to make it free from any error.
- Step 1: Locate the “Power” button at the back of your router and turn it off.
- Step 2: Unplug your router from the power socket and let it remain idle for at least 2 minutes.
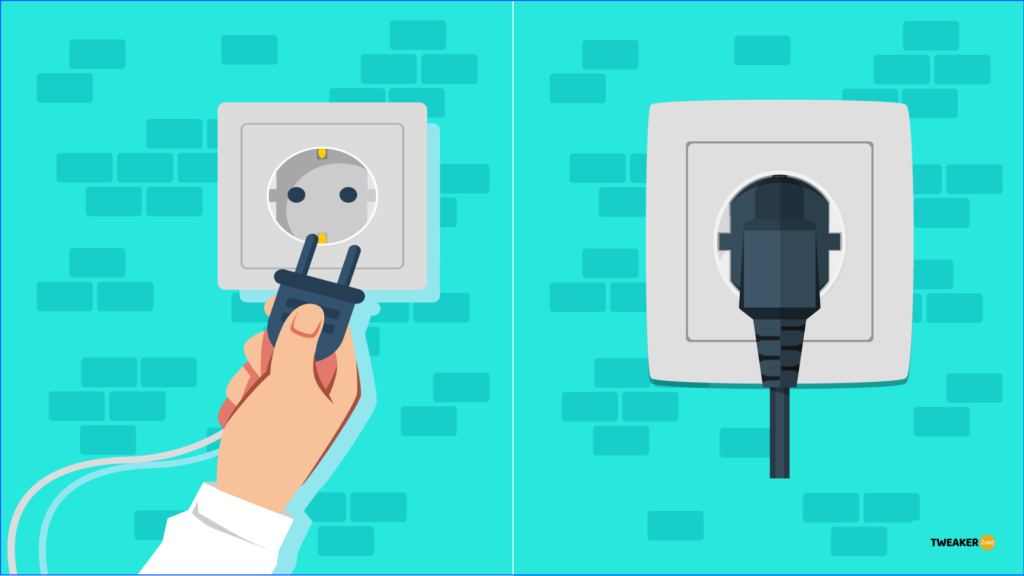
- Step 3: Plug your router into the power socket and wait for another minute more.
- Step 4: Turn on the “Power” button again and let all the flickering lights stabilize on your router.
- Step 5: Relaunch Minecraft and check if the connection has been established.
2. Update Minecraft
An outdated version of Minecraft can create several network issues. So, you need to check for the latest updates on timely intervals and install those to get an error-free gaming experience, even in multiplayer mode.
- Step 1: Double-click on the “Microsoft Store” icon to open it up.
- Step 2: Locate the “Library ” and click on the button to open it up.
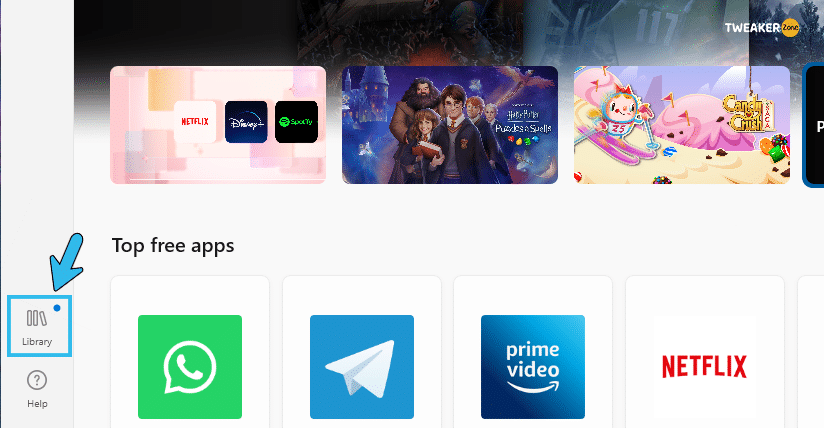
- Step 3: Find “Minecraft Launcher“, if it’s available there so a new update came. If not so, it’s doesn’t.
- Step 4: Now update it & you are good to go.
Many people have already reported getting graphical issues after installing the latest update of Minecraft. If you face any such issues, follow our step-by-step guide to solve Minecraft GLFW Error 65542 in your system.
3. Reinstall Minecraft
The server error code 500 can easily be triggered if you already have corrupted files and buggy directories in your installed game folder. In such cases, uninstalling and then reinstalling the game itself will solve the network issues.
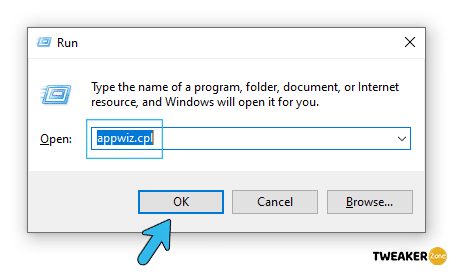
- Step 1: Press “Windows Key + R” to launch the “Run” dialog box.
- Step 2: Type “appwiz.cpl” in the run command box and hit Enter to launch the “Programs and Features” option.
- Step 3: Navigate to “Minecraft” from the list and right-click to open the additional options.
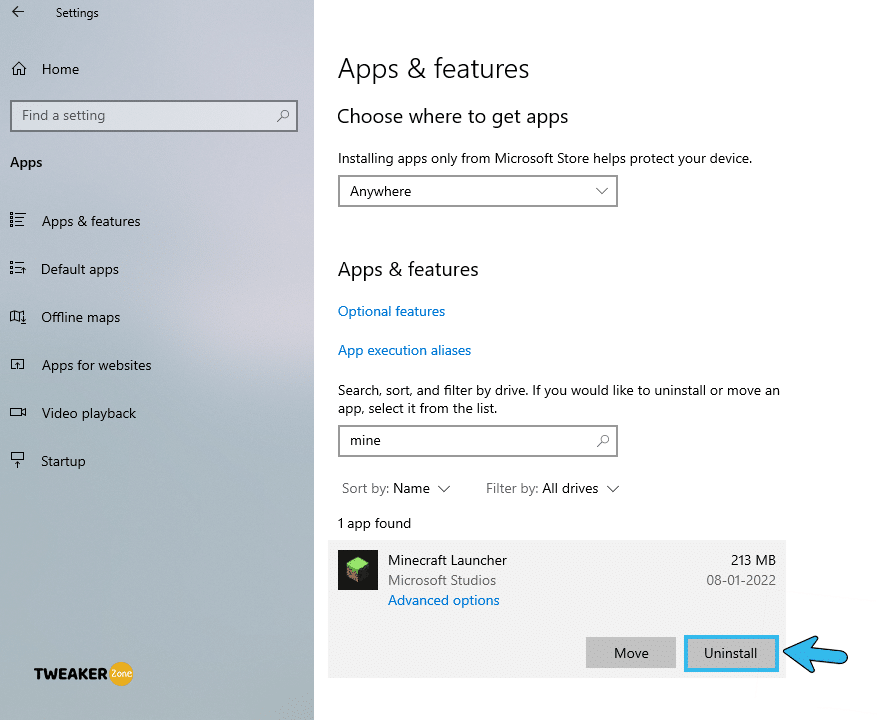
- Step 4: Click “Uninstall” and follow the on-screen instructions to remove the game from your system.
- Step 5: Press “Windows Key + R” again once the game is fully uninstalled.
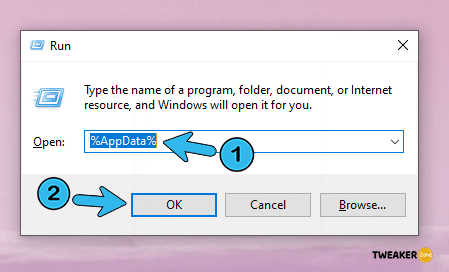
- Step 6: Type “%appdata%” in the run command box and hit Enter.
- Step 7: Locate the “.minecraft” folder from the newly opened directory and click to select it.
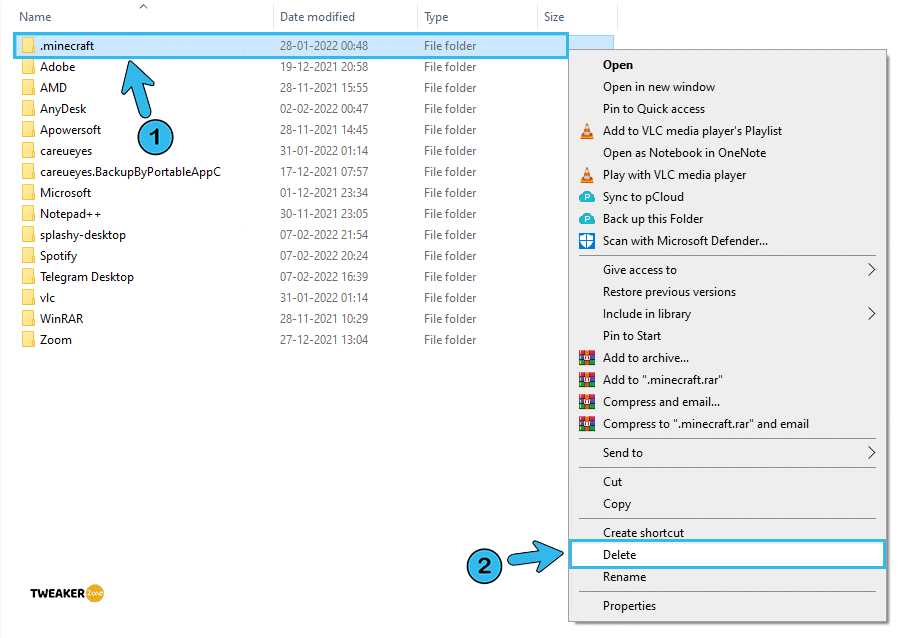
- Step 8: Press “Shift Key + Delete” or right-clicking & press delete to remove the folder from your system and reboot your device.
- Step 9: Go to the official website of Minecraft to install a fresh copy of the game.
If you have a modded variant of Minecraft, you can reinstall the mod from the same source once you install the original version of the game from the official site to your system.
7 Advance Fixes for the Internal Server Error In Minecraft
If you are still getting the network error while playing Minecraft even after trying the common fixes, your problem may be deep-rooted and need advanced fixes. So, follow these seven pro-methods to solve this issue in no time!
4. Tweak Network Configurations
A faulty network configuration can be triggered by the network connection in Minecraft, especially when you are running the multiplayer mode. But you can simply rectify those errors by resetting your network configuration.
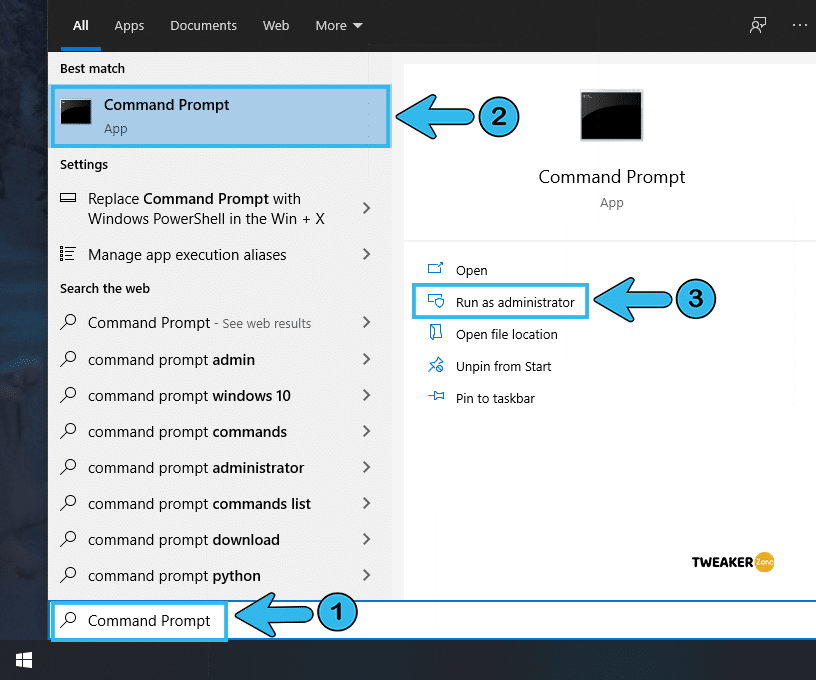
- Step 1: Click on the “Magnifying Glass” icon on the taskbar and type “Command Prompt” to initiate the CMD app.
- Step 2: Right-click on “Command Prompt” from the list and select the “run as administrator” option.
- Step 3: Once the CMD window pops up, type in the following commands one after another: “
ipconfig /flushdns” “ipconfig /release” “ipconfig /renew” “netshwinsock reset” and “netsh int ip reset”
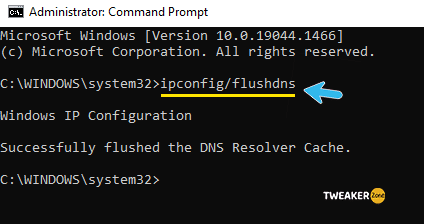
- Step 4: Restart your computer once the flushing procedure is over and relaunch Minecraft.
You may get an undefined network error after flushing your IP and DNS, especially if you use a static IP.
5. Disable All Plugins
If you are using any plugins (especially third-party plugins from unofficial sources) in Minecraft, it can trigger this error in Minecraft realms. So, you should disable all the plugins and rerun the game with its core variant.
- Step 1: Press “Windows Key + R” to initiate the “Run” dialog box.
- Step 2: Type “%appdata%” on that dialog box and hit Enter to open the “Roaming” folder under the “App Data” directory.

- Step 3: Navigate to the “Minecraft” folder and locate the “Plugins” folder inside it.
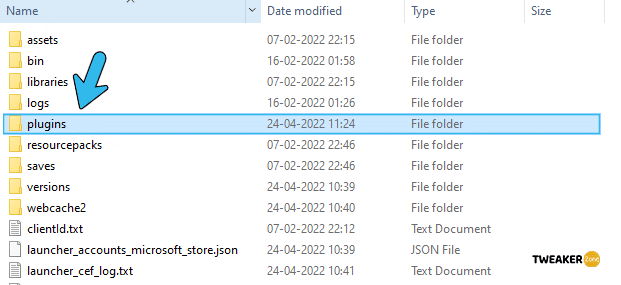
- Step 4: Double-click on “Plugins” and select all the available plugins from that folder.
- Step 5: Once you select every plugin, hit “Shift key + Delete” to completely remove the plugins from your system.
- Step 6: Relaunch your game and log in to your Microsoft account.
If you really need to install any plugins again, always stick to the official or registered sites. It is also better to install safe plugins that are reviewed by fellow players.
6. Disable All Mods
Many of us use mods in Minecraft to create a revamped look of this old-school game. However, enabling multiple mods at once can trigger internal network issues. So, you need to disable all the mods to identify the faulty one.
- Step 1: Double-click on the “Minecraft Launcher” option to initiate the game.
- Step 2: Navigate to the “Profile Editor” tab from the welcome menu and select the profile where you have installed all your mods.
- Step 3: Right-click on that profile and select “Delete profile” from the options.
- Step 4: Select “Delete Profile” or “Confirm” if you get any popup to remove the profile from your game completely.
- Step 5: Exit from the “Minecraft Launcher” and press “Windows Key + R” to open the “Run” dialog box.
- Step 6: Type “%appdata%” and hit Enter to open the roaming folder.

- Step 7: Locate the “Minecraft” folder and select the “version” folder from that directory.
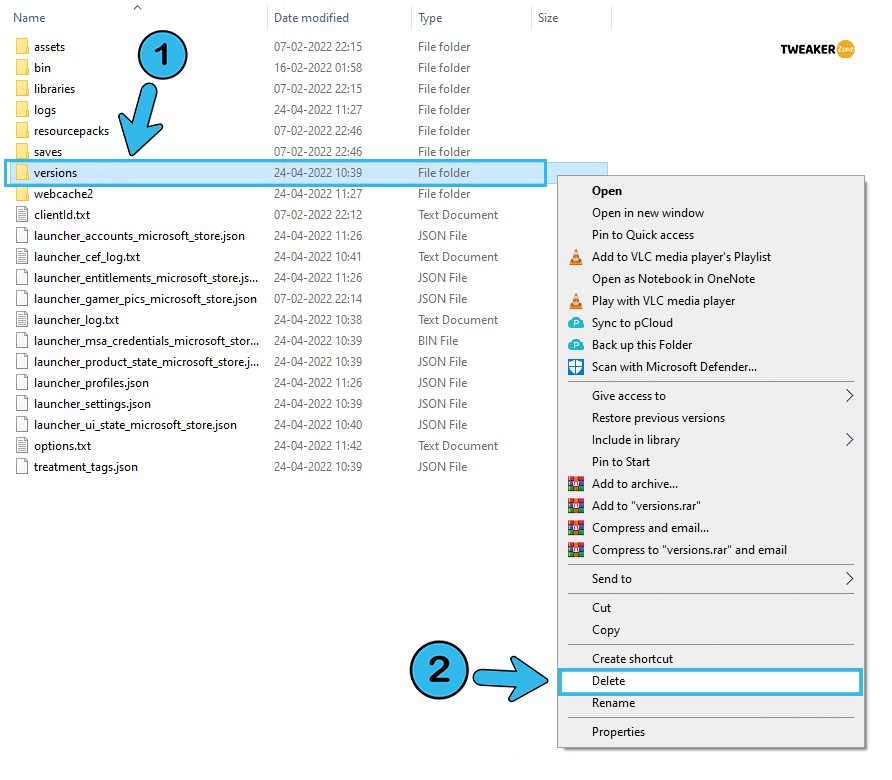
- Step 8: Select the “version” folder and right click on it & click delete to remove that mod.
- Step 9: Reboot your system and relaunch the game.
After removing all their mods, many gamers have reported getting group policy error messages. In such cases, follow our quick fix for the Internal Exception: Java.IO.IOException” Error in Windows.
7. Rename Problematic Mods
If you don’t want to remove all your mods from the game, there is another way to resolve this issue! It is just by renaming the mod and reinitiating the game. And in most cases, renaming the mod itself can solve the internal server errors in multiplayer mode.
- Step 1: Launch “Minecraft” and go to the “Control Panel” option from the welcome screen.
- Step 2: Locate your server from the control panel and stop it.
- Step 3: Click on the “File” menu and navigate to the “FTP File Access” option.
- Step 4: Provide the correct password once it pops up and follow the on-screen instructions.
- Step 5: Click on the “Server Folder” option from the newly opened window and navigate to the “Mods” option.
- Step 6: Select the mod file you want to customize and click on the “Rename” button at the top corner of that same page.
- Step 7: Add “.disable” at the end of your mod file;e.g., Rename “ABC.jar” to “ABC.jar.disable”.
- Step 8: Click on “Apply” to save the settings and exit from the FTP connection.
- Step 9: Relaunch your game and reconnect to the server from the multiplayer menu.
Renaming a faulty mod can trigger graphical issues like broken bows and a flickering screen. If any such problem persists, you can follow our quick fix to repair bow in Minecraft on Windows systems.
8. Set High Java Priority
By default, Java is set at a moderate or balanced priority until you manually override it on any Windows system. But putting the Java priority to a high standard can effectively solve the connection lost error in Minecraft.
- Step 1: Right-click on your taskbar at the bottom of your screen and select “Task Manager” from the menu, or press “Ctrl + Shift Key + Esc” at once to open it up.
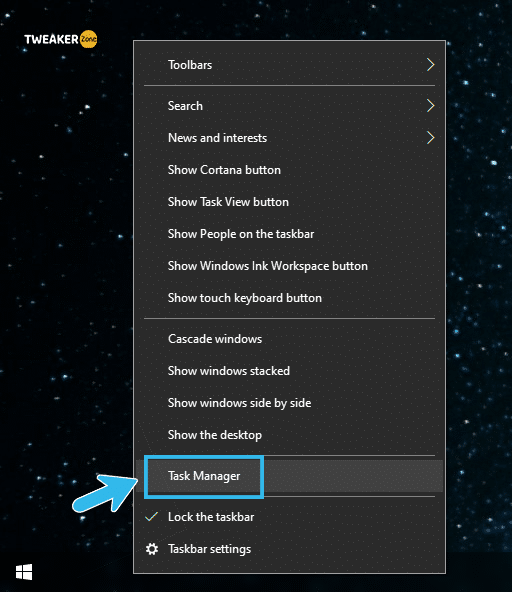
- Step 2: Shift to the “Details” tab and locate the “Java” application from running processes.
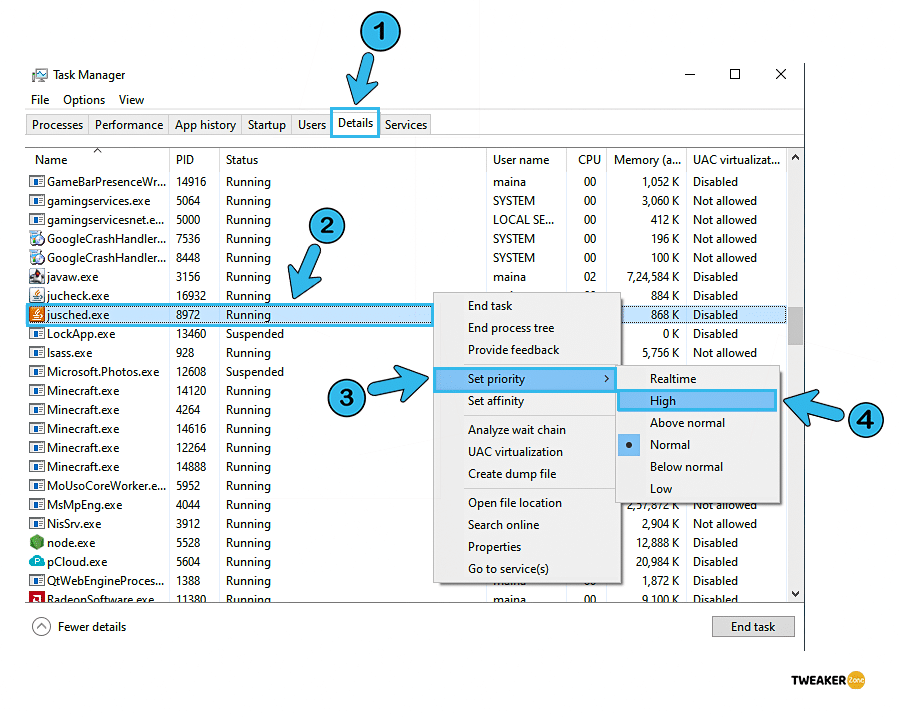
- Step 3: Right-click on the “Java” option and select the “High” option from the priority menu.
- Step 4: Exit from “Task Manager” and press “Windows Key + R” to launch the “Run” dialog box.
- Step 5: Type “%appdata%” and hit Enter to open the “roaming” folder.
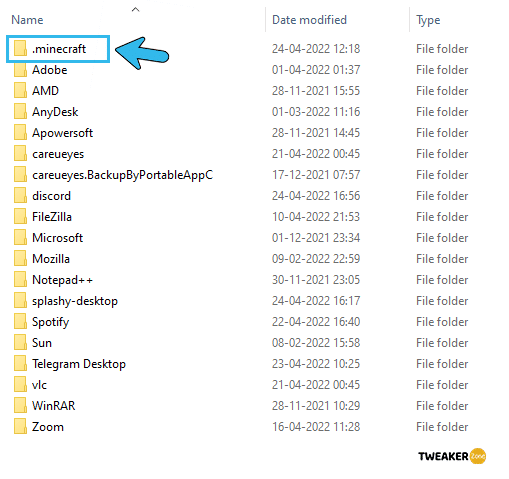
- Step 6: Locate the “.minecraft” folder and further navigate to the “TooManyItems” file inside it.
- Step 7: Open the file in the Notepad and make “Enable = True” on that file.
- Step 8: “Save” the file and relaunch the game.
Your system may get overstressed if you set your Java priority high. In that case, it is better to update your hardware to match the current system requirements to play this game in “high” graphical settings.
9. Edit Minecraft JSON file
The internal JSON file can also create issues in the multiplayer mode of Minecraft. So, you can manually edit the JSON file in a few simple steps to solve the internal server error in Minecraft.
- Step 1: Press “Ctrl + Shift Key + Esc” at once to open the “Task Manager” window.
- Step 2: Click on the “Processes” tab to open the complete list of running processes.
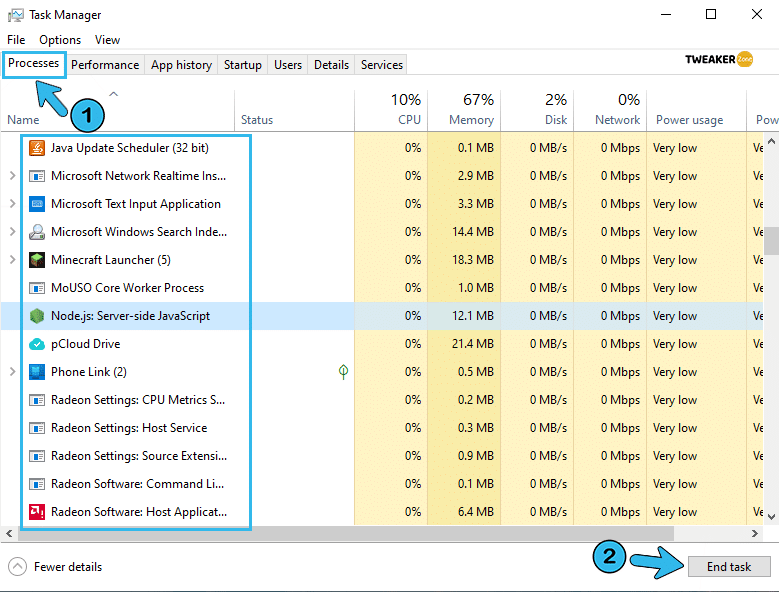
- Step 3: Locate all the unwanted applications from that list, right-click on those applications, and select the “End Task” option.
- Step 4: Locate your Minecraft folder and navigate further to the “Stats” folder.
- Step 5: Scroll down and locate the “JSON” file, and double-click to open it in Notepad.
- Step 6: Find the “stat.killEntity.EntityHorse : 3” entry and delete it.
- Step 7: Reboot your system and relaunch the game in multiplayer mode.
Always create a new “System restore point” from the windows restore and recovery option before manually overriding any JSON file. You can roll back to a previous point if any unforeseen circumstances happen.
10. Delete UUID Folders
A faulty UUID or universally unique identifier in Windows operating system can cause issues in the multiplayer mode of Minecraft. In such cases, it is better to delete the entire UUID folder and rerun the game.
- Step 1: Go to the “MCUUID” website and search your UUID by your registered username.
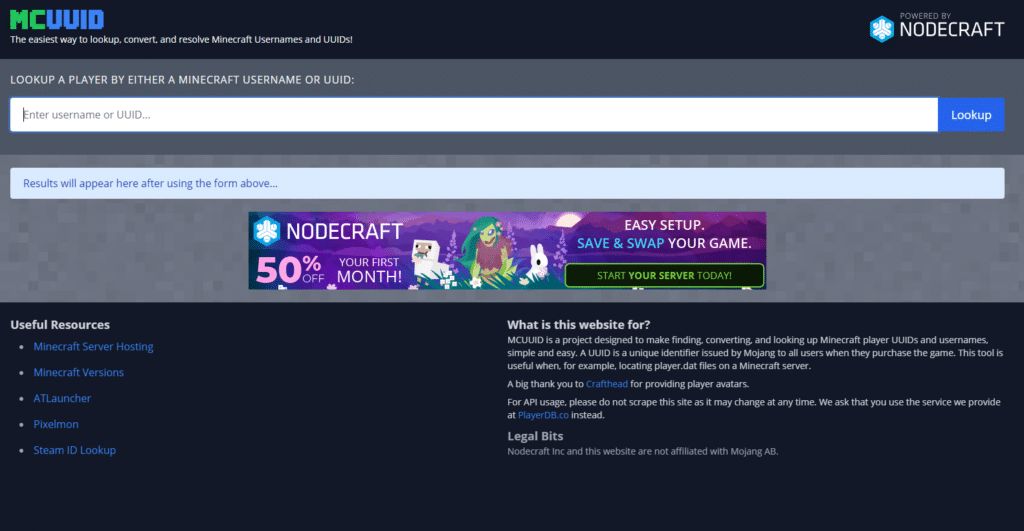
- Step 2: Properly put the credentials if it asks and obtain your active UUID.
- Step 3: Launch the “Minecraft Server” and go to the “Server Files” section.
- Step 4: Navigate to the “Worlds” tab and select the malfunctioning player’s profile by matching the UUID you have already fetched from MCUUID.
- Step 5: Delete both the “Username” and “Password” of that problematic UUID.
- Step 6: “Save” the settings and relaunch the game.
UUID is temporary data, and it won’t interfere with any other applications, even if that was still running! So, there is nothing to worry about while altering this UUID.
FAQs
Q. What does internal server error mean in Minecraft?
The internal server error mainly occurs when you try to establish a secured connection with Minecraft Realms (private servers of the game). Although it is primarily caused by server outage or any backend server settings, an obsolete Minecraft version or a low Java priority can also trigger this issue.
Q. What are the preliminary fixes of internal server errors?
There are three preliminary fixes for this internal error in Minecraft, especially if you are playing the multiplayer variant. First, restart both your PC and your router. Second, you should update and install only the latest version of the game. And third, you can completely uninstall and then reinstall the game.
Q. How do I fix Minecraft’s internal server error?
If the internal error is not solved even after restarting your system and updating the game, you should adapt pro methods to rectify the error. To fix this bug, you should tweak your existing network settings and disable both the mods and plugins. Besides, many people also set the Java priority high.
Q. Why does it keep saying internal server error?
If your connection with the Minecraft Realms or Minecraft online servers is unstable, the internal error can frequently pop up. It may also occur if you are using an obsolete version of the game and an outdated network driver while playing it in multiplayer mode.
Conclusion
It is not advisable to jump into trying pro methods to solve internal server errors in Minecraft, especially without trying the general fixes. In most cases, the general fixes will solve the issue without making advanced changes to the game and other network settings.
But yes, you definitely need to try the pro methods with utmost caution if the general techniques don’t work for you. Feel free to drop your queries in the comment box if none of these methods has solved your problem.


Leave a Reply
View Comments